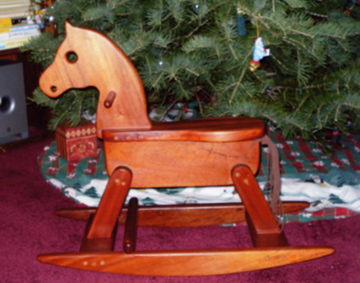
Build An Heirloom Rocking Horse
Assembly
My joinery methods are unusual, but I believe you will find them easier and more accurate than conventional methods, which use dowel centers and doweling jigs. I am a production woodworker. The processes I use have evolved with the goals of quality, speed and safety in mind.
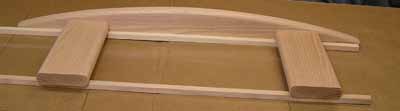
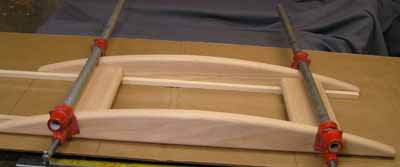
Begin assembly by marking the two rockers, in pencil, to show the locations where the cross pieces attach. (see pattern) Lay the rockers, curved side up, on your bench. Find a piece of 3/8 inch thick material (scrap wood strips, plywood, sheetrock, whatever) and place it between the rockers to support the cross pieces 3/8 inch off the bench. The cross pieces should now meet the rockers just above the 3/8 inch rounded over edges of the rockers. Push the pieces together and check the alignment. Place two bar clamps on top, over the joints, and check where their pads will apply the pressure. You will probably want to add small pads to the ends of your bar clamp jaws to apply the pressure directly over the joint. Place a small amount of yellow wood glue on the ends of the cross pieces and clamp the whole together with light to medium pressure. These glue joints are not for final strength. The dowels you run in later will supply that. Set this assembly aside to allow the glue to set up.
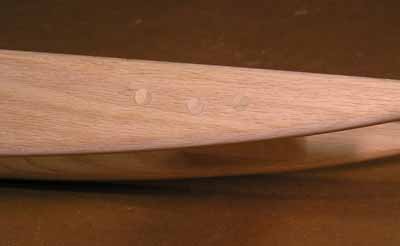
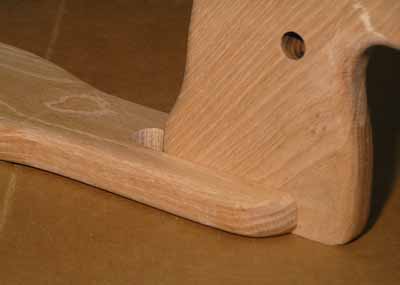
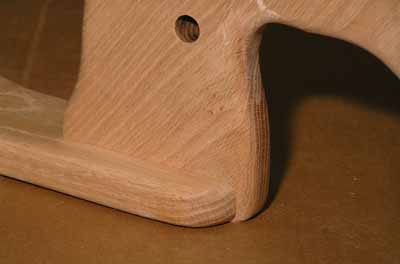
Later, remove the clamps and drill holes for the dowels. (see pattern) Cut the dowels 2 1/4 inches long and drill a 3 inch deep hole. The extra space is to prevent the dowel from bottoming in the hole. Glue is not compressible and will develop tremendous hydraulic pressure if you run out of room. This pressure can split any wood. Apply a thin layer of glue to the side of each hole and the side of each dowel and carefully hammer them in. Don't drive dowels below the surface of the rocker. Let the dowels protrude about 1/64 of an inch to be cut or sanded off later. I cut off the dowel ends with a sharp shallow sweep gouge, but a carefully applied belt sander will work.
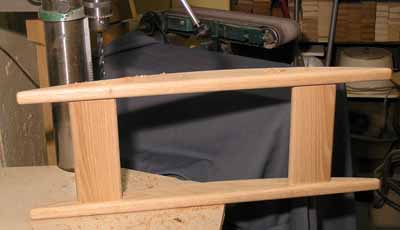
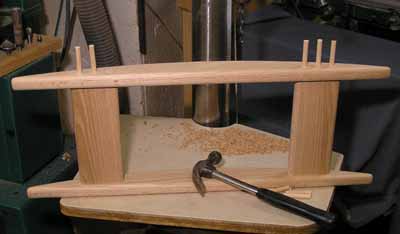
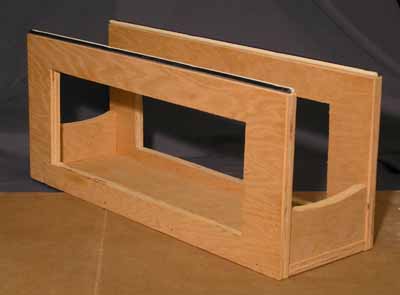
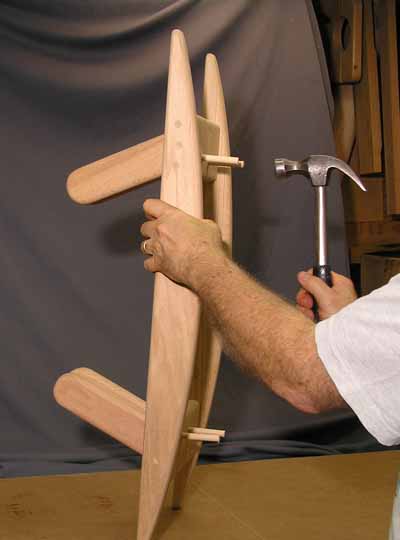
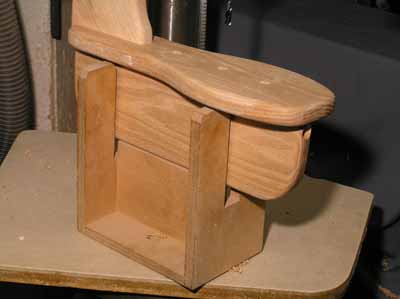
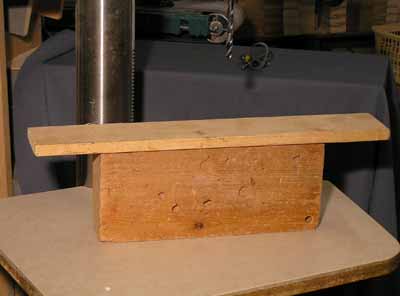
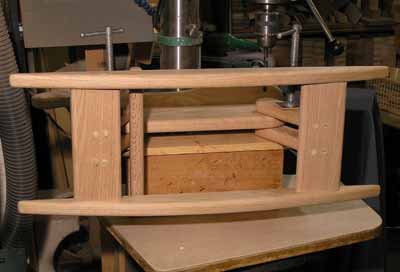
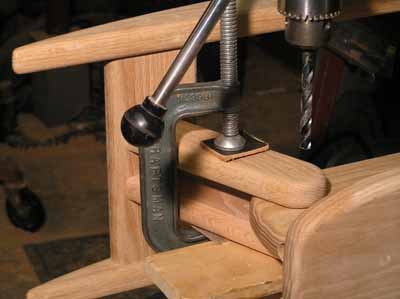
Place the resulting rocker assembly on your bench and mark the locations on the cross pieces where the legs will stand. Start by dividing the cross pieces in half, making a very light pencil line at 5 inches. The legs should be 17/32 of an inch from either side of this line if your horse's body is 1 1/16 inches thick. Remember the distance between the legs must equal the thickness of the horse's body. Place a coffee can under one end of the rocker assembly to make a leg placed on the other stick up straight. Apply a small amount of glue to the bottom of one leg and carefully place it in position on the lower cross piece. I use a scrap board the same thickness as the horse's body as shown in the photo below to place the legs. A couple dozen seconds of pressure is all that is necessary for the glue to hold. Now do the same for the second leg. After 5 minutes switch your coffee can and repeat for the other two legs. Let these glue joints set up for a few hours or overnight. The following day drill and dowel the leg joints. Turn the assembly upside down and drill these holes with your drill press. Use a U-shaped structure for support when drilling these holes. (see the U-shaped structure I use pictured just below) Drill two holes for each leg using care not to let your drill emerge through the side of a leg. I often drill one of these holes at an angle, with one dowel ending up parallel to the leg. (see pattern)
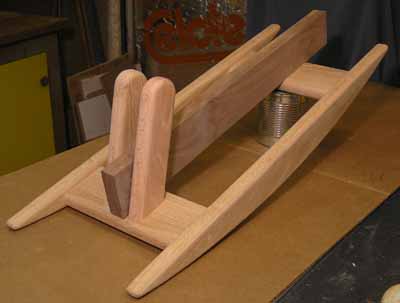
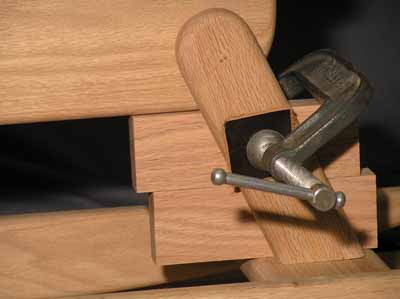
Now, while holding the assembly on end, carefully drive in dowels to secure the legs. Take your time here. It can be tricky holding things upright and driving dowels at the same time. It's a good time to call your spouse or friend to lend a hand. Again, hammer steadily. The glue can seize, and hard panicky hammering will knock off the legs. Drive one dowel into each leg and then go around a second time making two dowels per leg. Unlike the photo below, I hold my left hand on the horse's leg as I pound in each dowel. It helps. I often angle the second dowel as shown on the plans.
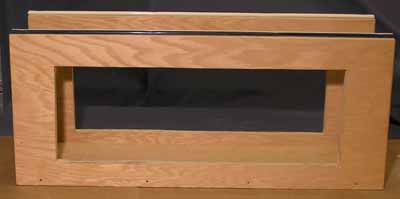
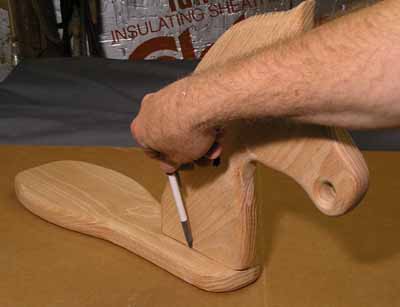
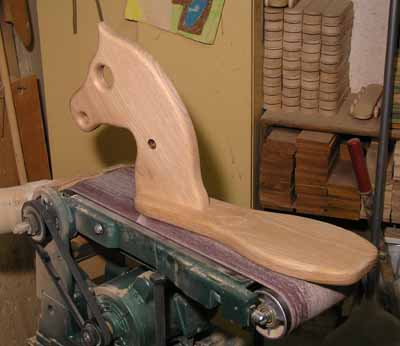
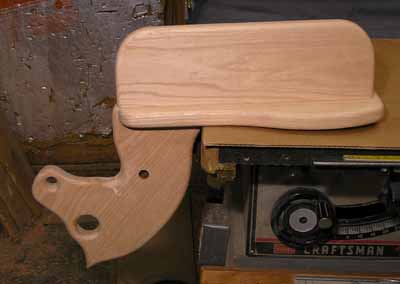
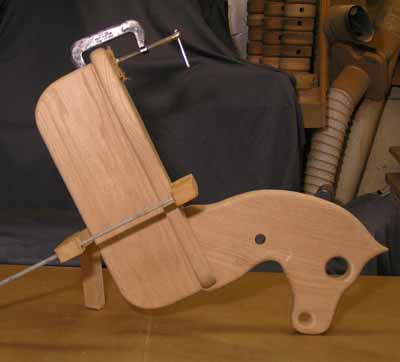
Congratulations! The hardest part is behind you. Now you need to try some careful band sawing. Take the horse's head and place it in position on top of the seat, leaving the head over-hanging on the front about 1/2 inch. (see pattern) Scribe around the base of the head with a fine-point pen or sharp pencil. Band saw away the waste, making a slot for the head. Carefully split the scribed line, sawing on the waste side. Remember, it is much easier to saw a bit again than to put wood back on if you've sawn too much. Saw and fit, saw and fit. Don't let this fit be too tight. That can set up stresses which can cause the seat to split next Winter. Also, leave a bit of the head protruding below the seat to be sanded off later. Use care. This joint shows clearly for all future generations to see. When you are satisfied with the fit, smear a small amount of glue on the inside of the band sawn slot and push or tap the head in. If you have made a careful fit, no clamping is necessary. Use a C clamp if you have sawn away too much wood. About an hour later sand off the portion of the head protruding below the seat.
Place the horse's body upon the upside down head/seat assembly. Do the surfaces fit closely along their length? If not, get out the hand plane. When you are satisfied with the fit, apply some glue to the body and place it on the seat. Use some hand pressure and move the pieces around slightly. You are making a classic rub joint. But, be conservative and apply a couple of clamps as well. If your clamps don't engage deeply enough, place a heavy weight on top to apply pressure. After an hour or two, drill the 7 holes (see pattern) and hammer in the dowels.
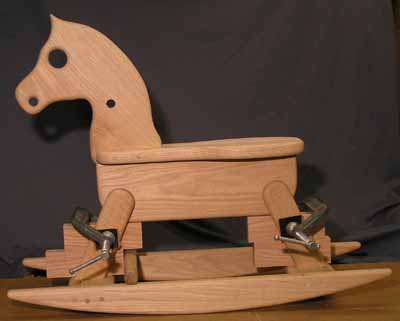
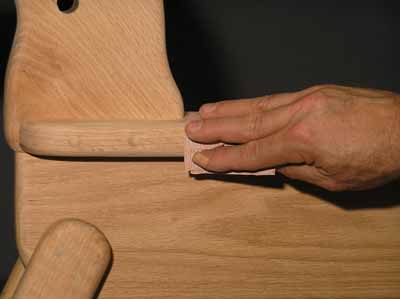
Now place the foot rest on the rocker assembly, just inside the legs on one end. (see picture on cover) Leave a gap large enough for your thumb between the foot rest and the legs. You don't want a child's finger getting stuck. Use a hand electric drill to drill holes through the foot rest into the rocker assembly, using the foot rest as a drill guide. Drill one side and hammer in the dowel, then the other. This avoids the need to carefully space your holes.

It is now time to join these two assemblies and make a horse. Insert the body of the horse between the legs of the rocker assembly. Make sure the foot rest and the horse's head are on the same end. Make 4 - 1/4 inch high blocks to prevent the body from going down too far between the legs. When you are satisfied with the alignment up and down and fore and aft, use a couple of C clamps on the legs to hold things steady. Place these about halfway down the legs and out of the way of your drilling. I use small leather pads to prevent clamp marks on the sanded wood. Drill 2 holes through each leg into the body of the horse. Mine go through the body and into the opposite leg. Stagger the hole positions on each side of the horse so they don't meet. Add some glue and hammer in the dowels. Your creation should look something like a horse by now.
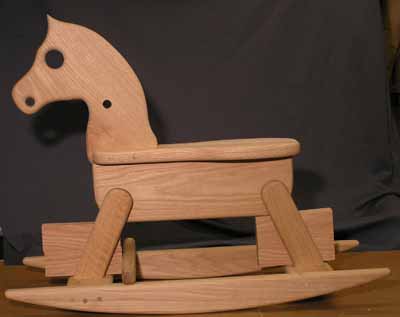
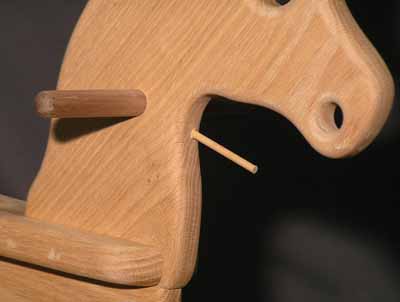
Stand the horse upright on his rockers and insert the handle. Here a snug fit is desirable. If you are lucky, your dowel is a bit oversized and you can carefully sand it to fit. Run in a 1/4 inch dowel in through the horse's throat to lock it in place. Turn the horse around and drill a 3/4 inch hole in the body, just below the seat, for its tail. Make this hole about 1 1/2 inch deep. Use care. There is not much wood thickness on either side. Scraps clamped on the sides before drilling provide good insurance. A mistake would be a pain in the ....
Your horse's assembly is complete. Check all the dowel ends and trim those that are proud. Now go over the entire horse with a very fine sandpaper. (320 or 400 grit) Fifteen minutes of elbow-grease now will be very noticeable later.
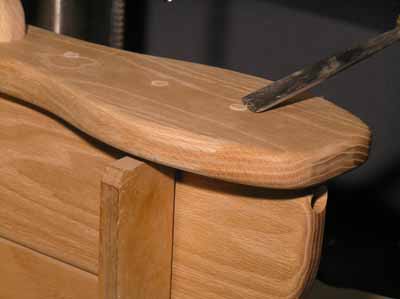
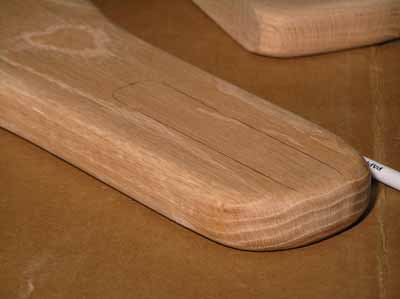
(above) Trimming the protruding dowel end
with a shallow sweep gouge.
The patient. - The pine tree seems to listen, the fir tree to wait: and both without
impatience: - they give no thought to the little people beneath them
devoured by their impatience and their curiosity.
Friedrich Nietzsche, The Wanderer and His Shadow, # 176.
Suburbia is where the developer bulldozes out the trees, then names the streets after them.
Bill Vaughan
All it has experienced, tasted, suffered:
The course of years, generations of animals,
Oppression, recovery, friendship of sun and - Wind
Will pour forth each day in the song
Of its rustling foliage, in the friendly
Gesture of its gently swaying crown,
In the delicate sweet scent of resinous
Sap moistening the sleep-glued buds,
And the eternal game of lights and
Shadows it plays with itself, content.
Herman Hesse, 1877 - 1962
A person walking in the woods or along the shore is apt to pick up a stick, break it to length, snap off the twigs, tidy the bark. This is basic woodworking....This is the first tool. But naked wood isn't much more durable then flesh. Few ancient artifacts of wood have survived, which is probably why the Stone Age is considered so important. But the Wood Age must have come first, and is still with us. Wood is our favorite material, so much so that we try to make acres of plastic laminate look just like it.
Fine Woodworking Biennial Design Book - 1977
Frid, Hoadley, Kelsey, Roman
For in the true nature of things, if we rightly consider,
every green tree is far more glorious than if it were made of gold and silver.
Martin Luther
Workmanship of the better sort is called, in an honorific way, craftsmanship. Nobody, however, is prepared to say where craftsmanship ends and ordinary manufacture begins. It is a word to start an argument with.
The Nature and Art of Workmanship
David Pye
Trees are poems that earth writes upon the sky,
We fell them down and turn them into paper,
That we may record our emptiness.
Kahlil Gibran
Sometimes richness of effect is no farther than is obtained by the natural beauty of the wood which is employed; and when this natural beauty is considerable, this simple kinde of furniture is most highly valued.
Hints and Practical Information for Cabinetmakers - 1884
John Phin
I'm sure I heard about chlorophyll and photosynthesis when I was in school, but I don't believe they ever struck me as having any more importance than, say, the Declaration of Independence - or geometry. No one ever impressed upon me...the astonishing priority held by the green plants of the third planet: priority number one....Take away all governments and armies, take away all businesses and industries... electricity, clothes, medicine and police...and most of us would survive. But take away the plants and we would all die.
Gentle Architecture - 1981
Malcolm Wells
Though all wood is basically similar, every fragment shows the variability found in all natural materials. No two pieces of wood in the world are exactly alike. This gives timber its unique fascination, for no other common durable substance shows patterns and properties peculiar to each piece.
What Wood is That - 1969
Herbert Edlin
Other holidays repose on the past.
Arbor Day proposes the future.
J. Sterling Morton
When you enter a grove peopled with ancient trees, higher than the ordinary, and shutting out the sky with their thickly inter-twined branches, do not the stately shadows of the wood, the stillness of the place, and the awful gloom of this doomed cavern then strike you with the presence of a deity?
Seneca
I think that I shall never see
A billboard lovely as a tree.
Perhaps, unless the billboards fall, I'll never see a tree at all.
Ogden Nash, Song of the Open Road, 1933
Sometimes Thou may'st walk in Groves,
which being full of Majestie will much advance the Soul.
Thomas Vaughan, Anima Magica Abscondita
Do not be afraid to go out on a limb ...
That's where the fruit is.
Anonymous